Product Care
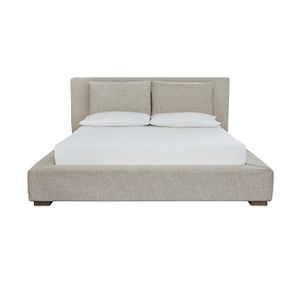
Fabric Care and Cleaning
- Weekly vacuuming or light brushing helps to remove soil and prevents the embedding or dirt between the fibers.
- Rotate and turn your cushions after vacuuming to prevent excessive wear and soil patterns.
- Never remove cushion covers for dry cleaning or machine-washing even though they have zippers.
- Avoid the use of dyes, acids, corrosives, paints, inks, nail polish, and removers around your furniture.
- Avoid placing newspapers on fabric since the ink could permanently stain the fabric.
- Periodic cleaning by an authorized technician will ensure that gradual buildup of soil, perspiration and oils does not cause permanent damage and shorten the lift of your fabric-upholstered furniture.
- Keep upholstered furniture away from direct sunlight to avoid fading.
Microfiber Care and Cleaning
- Vacuum your product with the attachment of a vacuum cleaner. Rotate and turn cushions after vacuuming to prevent excessive wear or soil patterns on one side only.
- Never remove cushions for dry cleaning or machine-washing even though they have zippers.
- Avoiding placing newspapers on Microfiber since the ink could permanently stain the product. Also, avoid placing your furniture in direct sunlight. All materials will fade over time when placed in direct sunlight.
- Get to spills quickly. Use an absorbent white terry cloth and blot the stain. Do not scrub it as it may worsen it. Blot out until completely dry. Avoid the use of dyes, acids, corrosives, inks, nail polishers and removers around your furniture.
- If you purchased the product protection plan, use the cleaner provided in the Protection Kit to wash stains or spots. Do not use bleaching products on your furniture, as this will discolor it. Use as little cleaner on the furniture as possible. Blot on then blot off, no scrubbing.
- Carpet washers that have attachments can cause the Microfiber to wrinkle and shrink. Avoid this and instead have a professional handle deep cleaning.
- Have your product cleaned professionally by an authorized technician periodically to deal with the gradual buildup of soil, perspiration, and oils.
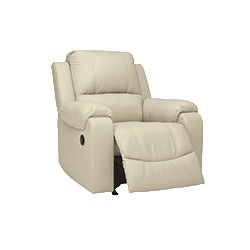
Leather Care and Cleaning
- Dust your furniture weekly
- If you purchased the product protection plan, four times a year after full cleaning and spot cleaning, apply our Leather Care Protection Lotion to renew the original protection level. Reapply the Leather Care Protection Lotion to all high usage and skin contact areas like seats, arms, front railing and inside backs.
Bi Cast Care and Cleaning
- Vacuum your product weekly with the attachment of a vacuum cleaner. Rotate and turn cushions after vacuuming to prevent excessive wear or soil patterns on one side only.
- Never remove cushions for dry cleaning or machine-washing even though they have zippers.
- Avoiding placing newspapers on since the ink could permanently stain the product. Also, avoid placing your furniture in direct sunlight. All materials will fade over time when placed in direct sunlight.
- Get to spills quickly. Use an absorbent white terry cloth and blot the stain. Do not scrub it as it may worsen it. Blot out until completely dry. Avoid the use of dyes, acids, corrosives, inks, nail polishers and removers around your furniture.
- If you purchased the product protection plan, use the cleaner provided in the Protection Kit to wash stains or spots. Do not use bleaching products on your furniture, as this will discolor it. Use as little cleaner on the furniture as possible. Blot on then blot off, no scrubbing.
- Carpet washers that have attachments can cause the material to wrinkle and shrink. Avoid this and instead have a professional handle deep cleaning.
- Have your product cleaned professionally by an authorized technician periodically to deal with the gradual buildup of soil, perspiration, and oils.
Vinyl Care and Cleaning
- Vacuum your product weekly with the attachment of a vacuum cleaner. Rotate and turn cushions after vacuuming to prevent excessive wear or soil patterns on one side only.
- Never remove cushions for dry cleaning or machine-washing even though they have zippers.
- Avoiding placing newspapers on material since the ink could permanently stain the product. Also, avoid placing your furniture in direct sunlight. All materials will fade over time when placed in direct sunlight.
- Get to spills quickly. Use an absorbent white terry cloth and blot the stain. Do not scrub it as it may worsen it. Blot out until completely dry. Avoid the use of dyes, acids, corrosives, inks, nail polishers and removers around your furniture.
- If you purchased the product protection plan, use the cleaner provided in the Protection Kit to wash stains or spots. Do not use bleaching products on your furniture, as this will discolor it. Use as little cleaner on the furniture as possible. Blot on then blot off, no scrubbing.
- Carpet washers that have attachments can cause the material to wrinkle and shrink. Avoid this and instead have a professional handle deep cleaning.
- Have your product cleaned professionally by an authorized technician periodically to deal with the gradual buildup of soil, perspiration, and oils.
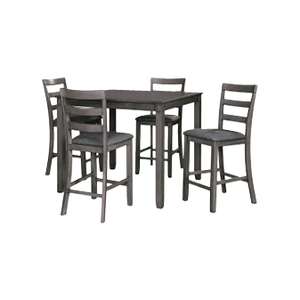
Wood Care and Cleaning
- Moderate to serious damage of fine wood furniture requires the help of a professional.
- To remove cloudiness, Run surface with a cloth dipper in a solution of one tablespoon of white vinegar to one quart of water. Rub with the grain until the surface is completely dry. If you purchased the product protection plan, follow with application of our Wood Cleaners or furniture polish.
- To remove water rings, rub with a mixture of equal parts white vinegar and cooking oil. Rub with the grain.
- To remove candle wax drippings, gently scrape off excess wax. Hold a hair dryer over the remaining wax on its power level. The wax will eventually liquefy enough to remove with a dull edge knife. Follow with application of furniture polish.
- Keep furniture away from heating and air conditioning sources to prevent loss of moisture in wood, and out of direct sunlight to avoid bleaching of wood.
- To prevent gouging and scratching, use felt backing on lamps, ashtrays, and accessories.
- Always use place mats under plates, hot pads under serving dishes, and coasters under hot and cold drinks.
- Do not set synthetics, rubber or plastic directly on wood finishes as they may contain chemicals that will damage the finish.
- Do not place newspapers and magazines on wood surfaces as the ink will bleed into the finish and eventually damage the wood.
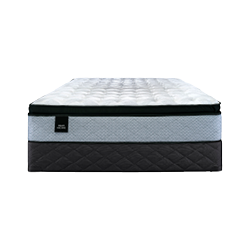
Bedding Care and Cleaning
Do's
- Rotate your mattress as needed, this will promote even wear.
- Use an appropriate frame and center support on Queen- and King-size sets to ensure validation of your warranty.
- Let your new sleep set “air” upon removal from its plastic packaging. Discard the plastic wrapping on your mattress as soon as possible
- Keep your bedding clean and use a mattress pad. Stains, soiling, fluid penetration or other signs of abuse may void the warranty and make your bedding ineligible for repair or replacement.
- If you need to store your mattress for an extended period, please store it flat.
Don'ts
- Remove the law tag at the end of your mattress as this has the identification needed to establish your warranty rights.
- Bend excessively or jump on your mattress under any circumstances. Such treatment may damage the mattress or box spring.
- Use cleaning fluids on your mattress. The chemicals may damage some of the materials.
- Allow your mattress to get wet. Any liquids, water or other fluids may damage upholstery causing materials to compress.
- Lift your mattress by the handles (if included). Handles are designed to position the mattress only.
Appliances
Please refer to the troubleshooting section of your owner’s manual and attempt the solutions for common problems. Here are some common problems you may be having with your appliance.
Appliance is not working
- Verify that the appliance is plugged in. Unplug and then plug the power cord back into the outlet to ensure you have a good connection.
- If there is still no power in your fridge, microwave, or washing machine, confirm that the plug is working. These appliances use a regular 110 plug. Take a small lamp or appliance and plug it into the outlet. Often large appliances are placed on their own breaker so you will not notice if it is tripped.
- For ranges, cook tops, built-in ovens, dryers and dishwashers, double check your breaker to ensure it has not been tripped. A helpful hint – built in ovens often have an additional breaker switch located somewhere above the oven
Dishwashers
- Are you using the recommended dishwashing soap and rinse agent as outlined in the Manufacturer’s user guide? If not, try this first. These are important to get maximum results from your appliance. Note: wrong type of detergent can lead to a leaking dishwasher.
- If the machine is making a “strange noise”, check the bottom of the dishwasher and remove any filters at the bottom. Often a small piece of cutlery, plastic, bones, paper, etc. may fall to the bottom and get caught in the filter system.
Laundry
- Are you using the recommended laundry soap (e.g. High Efficiency) as outlined in the Manufacturer’s user guide? If not, try this first.
- Have you completed the recommended maintenance as per your owner’s manual (e.g. afresh cycle, clean lint trays and vents)?
- Are the water hoses attached properly?
- Is there a “error” code that appears on the electronic display? If yes, try accessing the code from the manufacturer website for troubleshooting
Refrigeration
- Place a temperature gauge in the fridge or freezer and DO NOT open the door for 8 hours. Often when we feel it is not cooling properly, we open it more often to check which does not allow the fridge to cool to the right temperature. Keep the refrigerator temperature at or below 40° F (4° C). The freezer temperature should be 0° F (-18° C).
- Remove any items that are directly against the back of the freezer. If the vents in the freezer are blocked with food, it will limit the appliances ability to generate cool air (all cool air is created in the freezer portion!).
- Check the temperature settings in both the freezer and the fridge. Sometimes we accidently move settings when we place or remove items from the fridge.
- If your freezer feels slightly warmer but the fridge is fine, or if it takes a bit longer for your freezer to cool, wait 8 hours. Why? Your fridge might be going through the automatic frost-free cycle. What happens is the cooling unit is heated slightly to ensure that there is no buildup of frost


